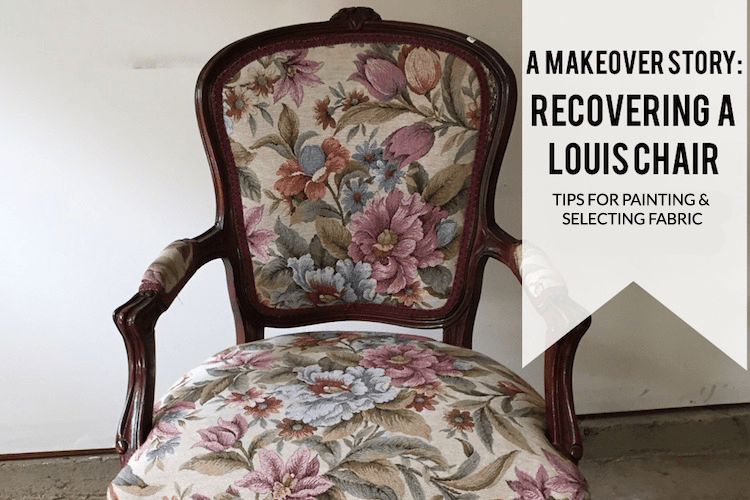
When will I learn that my so called “weekend projects” always seem to take a month or longer. The Louis Chair was no different. First, it took forever to remove the existing fabric because the chair had been previously reupholstered… meaning it had a thousand plus staples that had to be removed. After that came the painting and this post. Yay!
Prep
So before even thinking about paint or primer, the piece needs to be prepped. For the Louis chair, I started by sanding with a course sandpaper. At first I used a sanding block and then I stole borrowed my dad’s palm sanders to speed up the process. After sanding, I cleaned the chair with mineral spirits and allowed it to dry overnight.
Prime
Since the wood was a dark stain with red undertones, I did a couple coats of primer, 3 to be exact. I wanted to be 100% sure there would not be any bleed through since I was painting the chair white. I used Kilz Odorless spray primer and applied it in light coats. I allowed the chair to dry to the touch before adding another coat and then I allowed that coat to dry/cure for a week before adding paint. Why? It allows time to see if bleeding will occur and I got really busy with work & school.

The Lewis chair after primer (left) and paint (right).
Paint (The Fun Part)
I also used spray paint on the chair because I hate brush stokes. For this project I applied 2 coats of paint using Valspar Premium Enamel in gloss white. This was my first time (and probably will be the last time) using this paint. It applies very well; however, it smells really bad. I like to do my projects in the garage and even with both garage doors open and a fan, the smell was too much. I ended up finishing the chair in the backyard. In the end, I am very happy with the look and feel of the paint, so I guess that is all that matters.
Sealer
A long time ago, I learned (the hard way) never skip sealing your paint projects. The sealer acts as a protective barrier between your paint color and all the crap that comes into contact with your furniture. Without it chipping will happen much sooner. So for this project I used a spray polyurethane sealer in clear glossy. This was my first time using this brand so I will wait before recommending it but any hardware store will have a selection of poly sealers.
Choosing Fabric

So choosing the fabric for any upholstery project is always the best part for me. I love fabric stores. I remember spending hours in fabric stores with my grandma as a child. It was the perfect maze to get lost in back then. To be honest I still get lost in them today, it is just a different type of losing oneself. But as awesome as they are, don’t go in without a plan because it will end in being overwhelmed or spending money on something that you don’t like once you get home. So here are my tips for selecting fabric:
1. Browse for inspiration at home on the computer, in books, or magazines. Before heading to the fabric store on this project, I created an inspiration board. Then I thought about the colors in the room where the chair would be placed. For instance, my craft room has pale gray walls, white furnishings, and most of the fabric in the room is a purple solid color. So with this in mind I decided I wanted a print on the chair.
2. My two favorite places to shop for fabric in Atlanta are Lewis & Sheron Textile and Forsyth Fabrics. They have a large selection and they are right down the street from each other. But before I go there I always eat first. There is nothing worst than shopping on an empty stomach.
3. Now that we’re ready to shop, I like to start by going to the sale section first. You never know what you will find in there. If I don’t find something that I like there then I will go to the printed fabric or solid fabric sections. I’m a hands on person, very touchy feely, so when looking at fabrics I touch them. I give them a little pull too. Since, upholstery involves a lot of pulling. Then I cut a sample, usually about the size of a dollar, and take it outside to see how it looks in natural light. Then, if I like, I buy. 🙂
Happy Crafting!
-T
P.S. Follow me on Instagram for behind the blog updates.
Wow! It turned out beautiful! We have old chairs in our basement that I could probably try this on! The fabric is really gross so we keep them down there, but if I can redo them this way then maybe they could come upstairs
Go for it. It can be a little time consuming but it is worth it. Plus you will have one of a kind well made furniture.
What a great makeover and a fantastic finish. Thank you for sharing.
You’re such a DIY queen!
Aww thanks 🙂
i like the chair and the fabric looks great on it too. its not easy to choose chairs as they come in lots of varietys but the fabric is easy as its noticiable one. i loved the makeover it looks fabulous and very creative.
pretty
Oh yeah, sealer is really important with painting projects! I’ve learned that lesson, too. 🙂
I like the fabric you used,very nice. I replace the seat on a chair like this one,but I embroidered a cover,it turned out nice. Never done a whole chair makeover though.
Nice job!
I love re-doing old furniture! You did a fantastic job. Beautiful!
nice